iOS apps have two separate version numbers:
- Short bundle version string (e.g.
1.2) - Build number (e.g.
2002)

Each "short version" will often have a number of different builds within it, each of which is denoted by the build number.
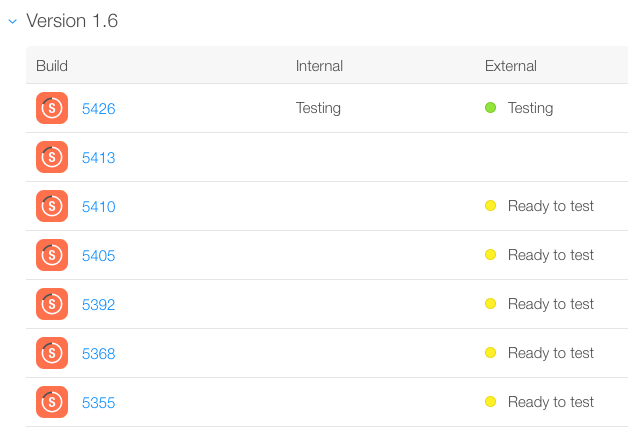
This is especially evident in TestFlight, when multiple builds can exist for each version number, as shown in the following image:

If you try and upload two builds with the same build number, iTunes Connect will complain.
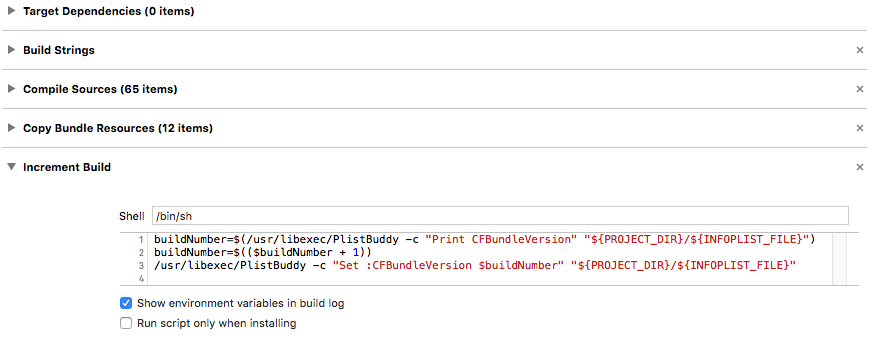
Incrementing these build numbers manually is a nuisance, so we can automate this in Xcode using a shell script!
buildNumber=$(/usr/libexec/PlistBuddy -c "Print CFBundleVersion" "${PROJECT_DIR}/${INFOPLIST_FILE}")
buildNumber=$(($buildNumber + 1))
/usr/libexec/PlistBuddy -c "Set :CFBundleVersion $buildNumber" "${PROJECT_DIR}/${INFOPLIST_FILE}"
This script reads the numeric build number from the plist file (e.g. 2002), increments it, then writes it back using the Xcode PlistBuddy utility.
You may need to refine the paths used, but these are the meanings of those used here:
-
${PROJECT_DIR}: The full filesystem path to the base directory of your project -
${INFOPLIST_FILE}: The relative path within your project to theInfo.plistwhere the build number is specifiedBonus material: List of Xcode Variables
To use this script, follow these steps:
- Select your app target in the project overview.
- Select Build Phases.
- Add a new build phase ("New Run Script Phase").
- Enter the above script in the appropriate field.
- In your
Info.plist, ensure the current build number is numeric (e.g.1).
Now when you build your target, the build the number will automatically increment. You'll still need to manually change the "short" version number when it's time to do so. If you are looking at the Info.plist while you build, you should see the number change after the build completes.

(Bonus tip: You can rename the build phase to something more useful as in the screenshot above, like Increment Build, by double-clicking on the phase title).)