One of the types of data that can be stored in the Apple Health app (or HealthKit, as the developer framework is known), is workout data.
HealthKit is a large framework with many options, so this article will break down a few basic concepts that you need in order to get going with it.
In HealthKit, a single data entry is called a sample, which is how it will be referred to in this article.
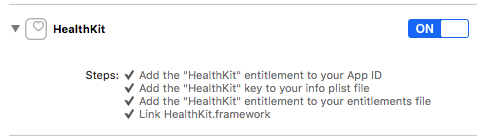
Adding the HealthKit Entitlement
When publishing an app that access Health data, you need to add the HealthKit entitlement to the app. You can do so under the Capabilities of your app's target in Xcode.
Checking for HealthKit Availability
When programming HealthKit, the first thing you need to do is to ensure Health data is available on the device.
HealthKit is not available on iPad or iPod Touch (it is also not available on tvOS, but in that case the HealthKit framework isn't even available, so you can't use it anyway).
You can check for the presence of the Health app as follows:
import HealthKit

if HKHealthStore.isHealthDataAvailable() {
    // HealthKit is available. Use at will.
}
else {
    // Unable to use HealthKit. Fail gracefully to non-Health features
}
Adding HealthKit Capabilities
Most operations in HealthKit involve using an instance of HKHealthStore. There should only be one instance of this class created in your app, so you should either instantiate this object your app delegate, or create a singleton class to manage this.
class AppDelegate: UIResponder, UIApplicationDelegate {
    let healthStore = HKHealthStore()

    // ...
}
You can then access it in future as follows:
let appDelegate = UIApplication.sharedApplication().delegate as! AppDelegate
let healthStore = appDelegate.healthStore
This is somewhat cumbersome, so a single class to help with HealthKit related tasks may be better:
class HealthHelper {
    class var sharedInstance: HealthHelper {
        struct Singleton {
            static let instance = HealthHelper()
        }

        return Singleton.instance
    }

    let healthStore = HKHealthStore()
}
This would allow you to access the health store as follows:
let healthStore = HealthHelper.sharedInstance.healthStore
Requesting Permission
Before you can access a user's data in HealthKit, the user needs to grant your app permission to do so.
HealthKit breaks permissions down by data type (such as "workouts", or "weight", or "heart rate"), and within each type there can be read or write access.
- Read access: You can read data for a given type that has been written by your app or another source (such as when the user manually enters it into the Health app)
- Write access: You can record new samples. You can also delete samples, but only those recorded by your app.
When requesting permission, you can ask for as many or few permissions as you need in a single request. In this case, we're going to request two permissions: read permission for workouts, and write permission for workouts.
Permissions are requested using the HKHealthStore.requestAuthorizationToShareTypes() method, in which you pass a list of read types and a list of write types.
In the case of workouts, there is a special object type called HKWorkoutType, which can be accessed using HKObjectType.workoutType().
let writeTypes: Set<HKSampleType> = Set([ HKObjectType.workoutType() ])
let readTypes: Set<HKObjectType> = Set([ HKObjectType.workoutType() ])
You can request access to these permissions as follows:
let healthStore = HealthHelper.sharedInstance.healthStore

healthStore.requestAuthorizationToShareTypes(writeTypes, readTypes: readTypes) { (success: Bool, error: NSError?) -> Void in
    // Do something here once finished
}
HealthKit doesn't actually tell the app if the user granted permission. It is safe to call this method every time you run the app: if a permission has previously been requested, the user will not be prompted again for that permission.
Recording a New Workout
A new sample can be recorded using the HKHealthStore.saveObject() method. Since we're recording a workout, we pass an instance of HKWorkout to this method.
To create a HKWorkout, the minimum amount of data you need is the start and finish times, and the type of activity type (there's a whole bunch available in the HKWorkoutActivityType enum).
For example, to create a running workout that went for an hour, you can use:
let finish = NSDate() // Now
let start = finish.dateByAddingTimeInterval(-3600) // 1 hour ago

let workout = HKWorkout(activityType: .Running, startDate: start, endDate: finish)
Sometimes though, the user might pause their workout because they received a phone call or went to do something else. In this case, the actual workout duration is not the full time between the start and finish. HealthKit allows you to record these events also, using the HKWorkoutEvent class.
In the case of the 1 hour workout in the previous code listing, if the user stopped after 5 minutes (300 seconds), then resumed after another 5 minutes (600 seconds since the beginning), you can record these events as follows:
let workoutEvents: [HKWorkoutEvent] = [
    HKWorkoutEvent(type: .Pause, date: startDate.dateByAddingTimeInterval(300)),
    HKWorkoutEvent(type: .Resume, date: startDate.dateByAddingTimeInterval(600))
]
Now you need to alter the creation of the HKWorkout object to use the more complex constructor, which allows you to include workoutEvents:
let workout = HKWorkout(
    activityType: .Running
    startDate: start,
    endDate: end,
    workoutEvents: workoutEvents,
    totalEnergyBurned: nil,
    totalDistance: nil,
    device: nil,
    metadata: nil
)
As you can see, there are other fields you can optionally include. To record the energy burned or distance travelled, pass objects similar to the following:
// 1,000 kilojoules
let totalEnergyBurned = HKQuantity(unit: HKUnit.jouleUnitWithMetricPrefix(.Kilo), doubleValue: 1000)

// 3 KM distance
let totalDistance = HKQuantity(unit: HKUnit.meterUnit(), doubleValue: 3000)
You can also record additional metadata with the workout. There are a number of predefined metadata fields you can use for this (which you can find in HKMetadata.h). Note that each one expects a different type of data with it (in this case, all three accept boolean values).
let metadata: [String: AnyObject] = [
    HKMetadataKeyGroupFitness: true,
    HKMetadataKeyIndoorWorkout: false,
    HKMetadataKeyCoachedWorkout: true
]
To record this extra data, you would use the following to create the workout object:
let workout = HKWorkout(
    activityType: .Running
    startDate: start,
    endDate: end,
    workoutEvents: workoutEvents,
    totalEnergyBurned: totalEnergyBurned,
    totalDistance: totalDistance,
    device: nil,
    metadata: metadata
)
Once you have created the HKWorkout object, pass it to HKHealthStore.saveObject to save it:
healthStore.saveObject(workout) { (success: Bool, error: NSError?) -> Void in

    if success {
        // Workout was successfully saved
    }
    else {
        // Workout was not successfully saved
    }
}
Reading Data
To read workouts that have previously been saved (either by your app or other apps), use the HKHealthStore.executeQuery() method. There are a number of different types of queries that can be supplied (including the ability to automatically detect when new data appears), but in this instance a once-off query will be used.
As noted previously, a single record of data in HealthKit is a sample. To read a list of samples, HKSampleQuery is used.
You can only retrieve a single sample type from a single query. In this case, we want to retrieve workouts:
let sampleType = HKObjectType.workoutType()
Similar to querying a database in CoreData, you can filter the returned data using NSPredicate. To return only records from the past hour, you would use the following:
let startDate = NSDate()
let endDate = start.dateByAddingTimeInterval(-3600)

let predicate = HKQuery.predicateForSamplesWithStartDate(startDate, endDate: endDate, options: .StrictStartDate)
In this case, the .StrictStartDate option means only workouts that began between the time range are returned. If a workout started two hours ago but only finished five minutes ago it will not be returned using this predicate.
If you want to use the end date instead, you can use .StrictEndDate. If you want to ensure it started AND finished in the time range, use [ .StrictStartDate, .StrictEndDate ].
You can also sort the returned results using one or more NSSortDescriptor objects. The following would result in workouts being sorted by their end date, with the most recently ended first.
let sortDescriptor = NSSortDescriptor(key: HKSampleSortIdentifierEndDate, ascending: false)
Additionally, you can limit the number of results returned using the limit parameter. A value of 0 means all records are returned.
let limit = 0
Using these parameters, you can create the query as follows:
let query = HKSampleQuery(
    sampleType: sampleType,
    predicate: predicate,
    limit: limit,
    sortDescriptors: [ sortDescriptor ]) { (query: HKSampleQuery, results: [HKSample]?, error: NSError?) -> Void in

    // Process the results
}
Of course, this has only created the query. To actually run it, use the following:
healthStore.executeQuery(query)
Finally, you need to actually process the results. Since HealthKit queries are run asynchronously, the supplied completion handler provides the query results.
Rather than duplicating the above, the following code lives inside the completion handler block:
var workouts: [HKWorkout] = []

if let results = results {
    for result in results {
        if let workout = result as? HKWorkout {
            // Here's a HKWorkout object
            workouts.append(workout)
        }
    }
}
else {
    // No results were returned, check the error
}
At the end of this, you will be left with an array of HKWorkout objects.
Filtering Data by App
You can check if a sample was created by your app using the sourceRevision property, which is of type HKSourceRevision.
let workout: HKWorkout = workouts[0]

let sourceRevision = workout.sourceRevision
From this value, you can determine the app and its version from the source and version properties. The source property is of type HKSource, while the version value corresponds to the CFBundleVersion value from the app's Info.plist.
To determine if a given sample was recorded by your app, you can compare source to the corresponding HKSource value for your app. You can do so as follows:
let currentSource = HKSource.defaultSource()

if sourceRevision.source == currentSource {
    print("Recorded by this app")
}
else {
    print("Recorded by an app called \(sourceRevision.source.name)")
}
Deleting Data
An app cannot delete Health data recorded by another app. For example, if you manually enter a new workout in the Health app directly, you will be able to read that sample (if the user has given permission), but you cannot delete it.
The previous section showed how to filter records by the current app. This is useful so you know which records can or cannot be deleted.
To delete a sample, pass it to HKHealthStore.deleteObject().
healthStore.deleteObject(workout) { (success: Bool, error: NSError?) -> Void in

    if success {
        // Workout was deleted
    }
}
Similarly, you can delete multiple objects at once by passing an array of HKObject to HKHealthStore.deleteObjects() (so in this case, you would pass [HKWorkout] to delete multiple workouts).
If any of the workouts cannot be deleted in the call to deleteObjects(), then none of them are deleted.
Happy HealthKit hacking!